 I love to use old wood and make something new. This wooden cross is from the paneling that was on the walls in our house. The house was built in 1988. The living/dining space was covered in paneling. It was actually done very nicely….for paneling. It was framed and layered and looked good for what it was. But all I saw was paneling! My hubs loved it and didn’t want to see it go. As you can see from this picture….it went!
I didn’t throw any of it out. I just made a large pile (when I say I, I mean, my hubs!…okay, I did help make the pile of wood, I am good at collecting…stuff!). I have been dipping into said pile of wood for many projects. This one I have been wanting to try for several months now and I finally got around to making it. I think it turned out pretty good for old paneling.
Looks good now!!!
Because it isn’t on my wall…..or at least not covering my wall!
I gathered my supplies:
Scrap wood.
Ruler (to make sure my edges were equal).
Pen.
Sandpaper.
Paint.
Stain.
Polyurethane (sealer).
Paint brushes.
Jigsaw.
Clamps (to hold wood to table for cutting).
Metal saw tooth hanger for back.
Glue (craft goop, I like a thick glue).
Decorative crosses from local craft store.
Safety glasses.
I found a cross pattern I liked and cut it out for my pattern.
Trace your pattern onto the wood. Make sure your lines are dark enough to see once you start cutting.
Be sure to wear safety glasses!
Start cutting your design out. I used a jigsaw for this project.
I clamped my wood (because it is really thin) to my table saw so it didn’t move on me and it made it easier to cut out.
After it is cut out, you will need to sand it smooth. I used a palm sander but you can do it by hand…it is a small project.
Paint it whatever color you wish.
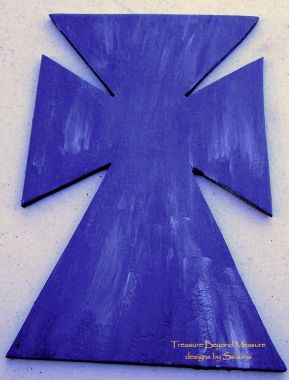
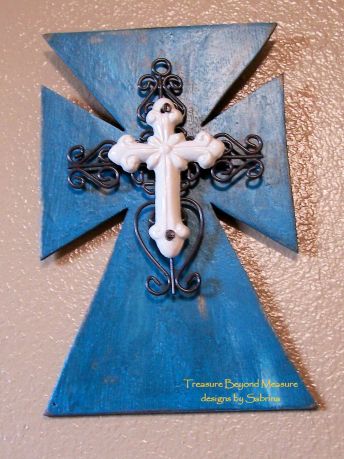
I painted this one a teal with spots of a lighter blue to give it more interest. I mix colors for most of my projects. I collect paint and then mix together to get custom colors and that is what this one is!
The color in this picture is not true (closer in the last pic). But at least you get the idea it is painted. I then sanded it a bit more and used stain to distress it, to give it an aged look. Then use a poly sealer on it. Let it dry between coats of paint and stain and sealer.
If you don’t want to age your project, just paint it, you can seal it with something made to seal paint or not seal it (depending on where you hang it). Either way should work fine.
Once it is completely dry I glued (the wood was too thin to use the nails that came with the hanger) the saw tooth hanger in the middle of the back (this is where the ruler comes in handy…center that hanger!)
Then I glued my decorative cross in the middle.
And it is finished! After it drys of course.
That wasn’t so hard, was it?
If you have any questions, let me know.
Good luck with your own cross projects.
Craft on,
Sabrina


