Here I will introduce you to the “secret” world of shaped crayons.
Okay, okay….there is no secret world….just fun and coloring!
My grandsons thought these were pretty cool colors. I made them some for their Valentine’s Day goodies.
We don’t give candy so I had to get creative and give them things they could use. These fit the bill nicely.
Supplies needed:
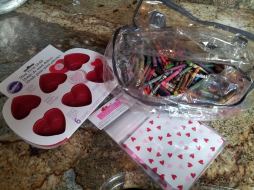
crayons ~ new or used
(this old bag was from when my children were little…I thought it was pretty cool to melt crayons for my grandsons from the crayons their mother, aunt and uncle used as children)
silicone mold (whatever shape you want)
baggies (for gift giving…optional)
oven (set at 350)
potholders
I peeled the paper off all the crayons I planned to use. I will tell you for the second batch I bought large boxes of crayons at the Dollar store and the paper came off pretty easy. The old crayons….not so much!
Once you have them unwrapped you will need to break into pieces. I think the smaller the better but after awhile it started hurting my hands to break them. I tried to break each crayon 3-5 times. You don’t have to break them that much it just gives you more colors when they start to melt.
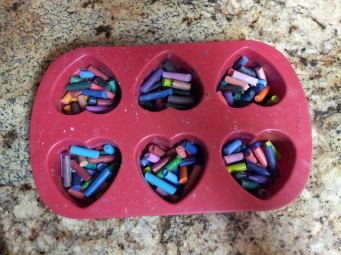
I filled each cup about half way or a little more. You don’t want to go too shallow or the crayons will be too thin and break with first use. Just don’t fill to the top. About the middle works great.
After you fill your cups with a good mix of crayons carefully set the silicone mold in your preheated oven.
And get ready to smell melted crayons! They pretty much stink while melting.
Leave them in until all pieces are melted…about 20 minutes.
Once they are melted carefully take them out.
Use both hands and potholders! They are HOT!
Set them on top of your stove top and let them cool. It takes about 5-10 minutes to cool enough to remove without breaking them.
Once they are cool enough (you can tell by pushing one from the bottom and seeing if it is going to slide out easily) turn the mold upside down and gently push each crayon out of it’s cup. If they are stuck just keep gently pushing from the bottom and they will release.
Done!
I put them in these cute little zip lock baggies for gift giving.
Easy project. Kids can help with the peeling and breaking parts and the popping out of molds after they cool part.
A week after we mailed these to our grandsons, we got two letters in the mail from our oldest. He had colored two pages with them to show us how cool they were. He loved that they colored different colors in one crayon.
They will be a hit with the children in your life as well.
Get creative with the shapes. Make them for party favors in shapes that go along with the theme. I have seen stars, dinosaurs, and other great shapes.
I also, had a few crayons that had glitter in them. They are pretty cool to mix into them as well.
Glitter in star shapes for a little girls princess party. The star could be the top of the magic wand. Oh, wait I don’t have any granddaughters….silly me! I only know how to have boy themed parties!
Use your imagination and just have some fun! Let me know how it works for you and your sweet little ones.
Craft on,
Sabrina


